The Plan
As part of the new crafts room for my wonderful wife, she has requested a sewing cutting table with storage. We looked at many pictures and the design was taken from the idea of two bookshelves under a 3 x 5 ft top. Many of the designs featured using Ikea book shelves with some wood working for the top and bottom.
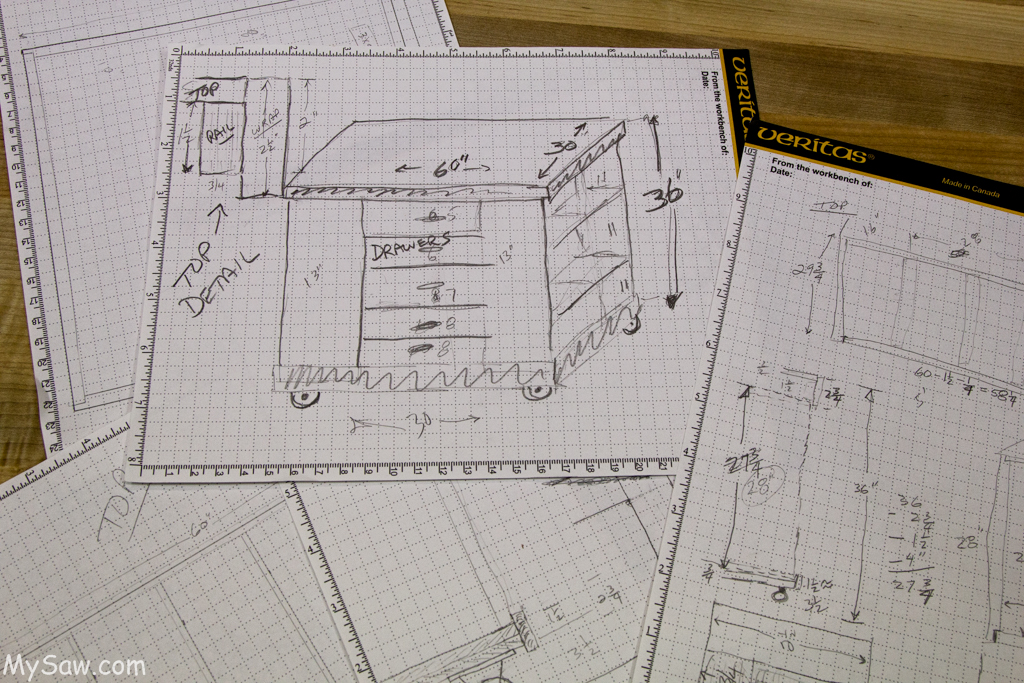
This ALWAYS morphs into a more refined design, but is sufficient to get plywood from HomeDepot.
From that idea, I showed my wife a 30″ x 60″ top piece. This looked good to her. She had been using part of the kitchen counter for cutting quilting pieces, so we knew 36″ height would be correct. Given those parameters I started on the design process. The end shelf units ended up at about 30″ x 30″ x 16″ deep. This configuration will allow several different kinds of storage boxes to fit on the adjustable shelves. I am building 5 shelves for both ends.
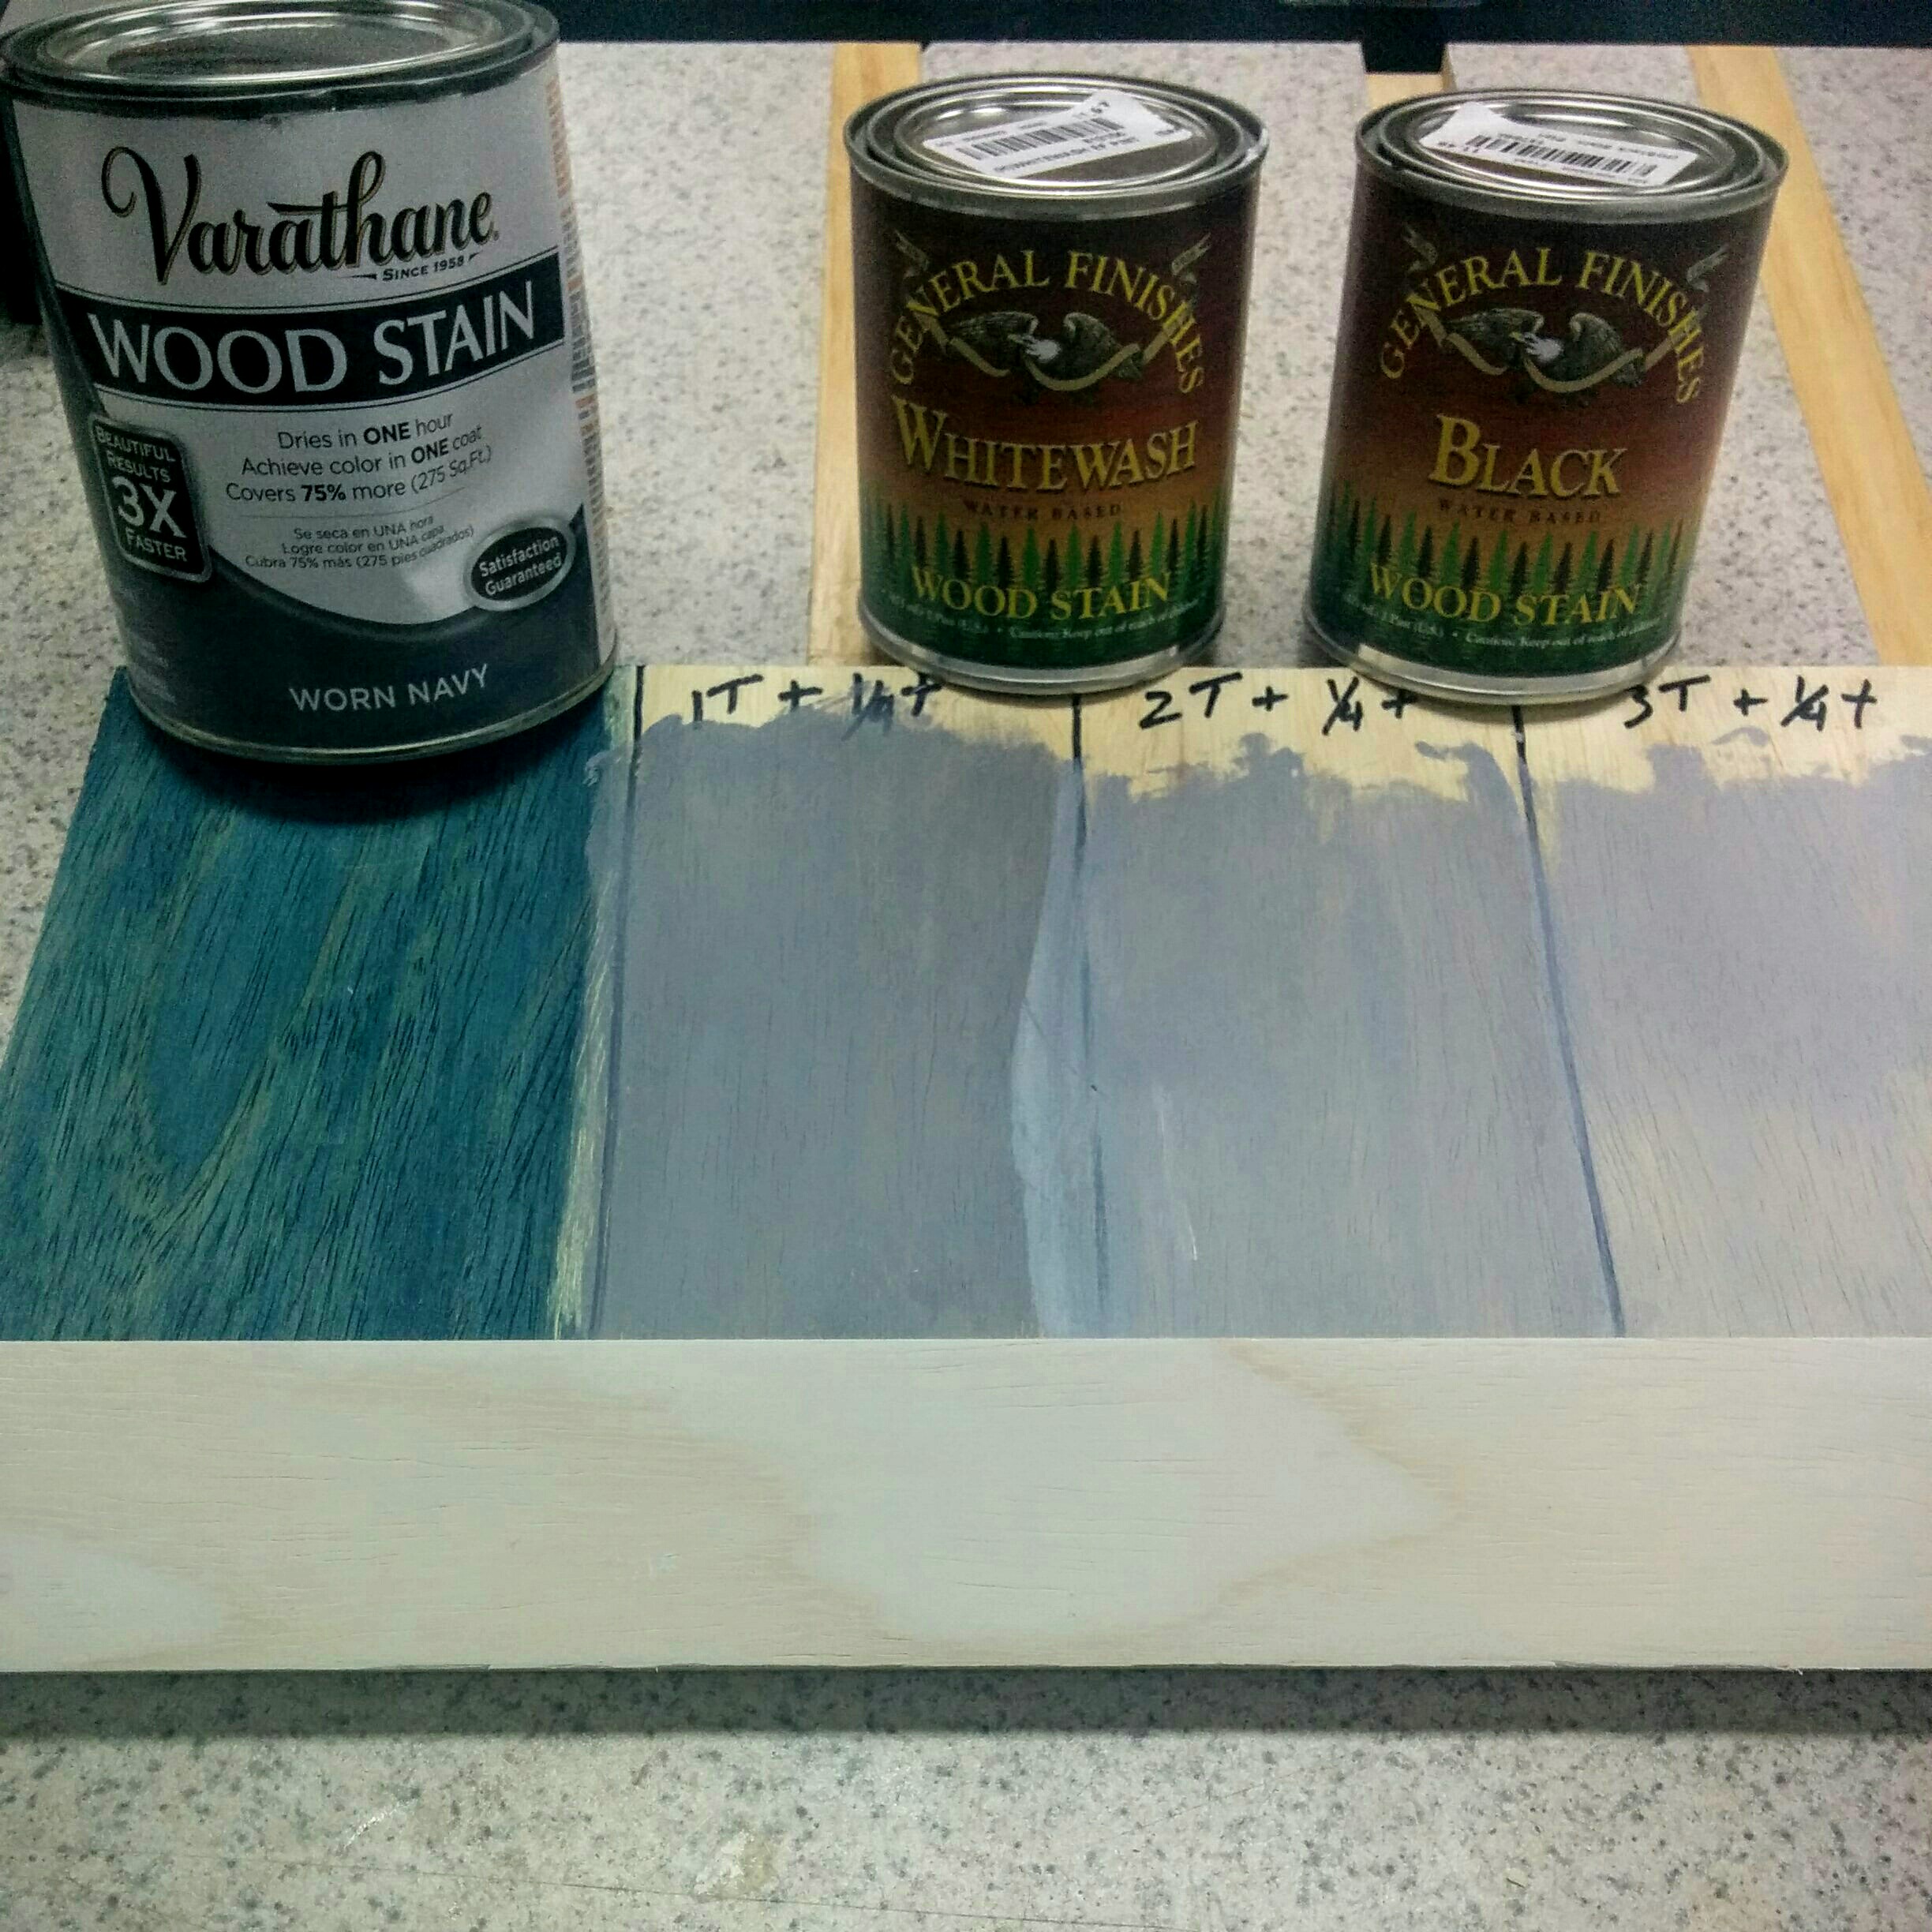 Always check your plans and idea with your “customer”, in this case my wife. My wife had requested a “gray” color for the cabinet due the already abundant colors in the sewing room. I created some samples and finally found a gray “stain” that worked.
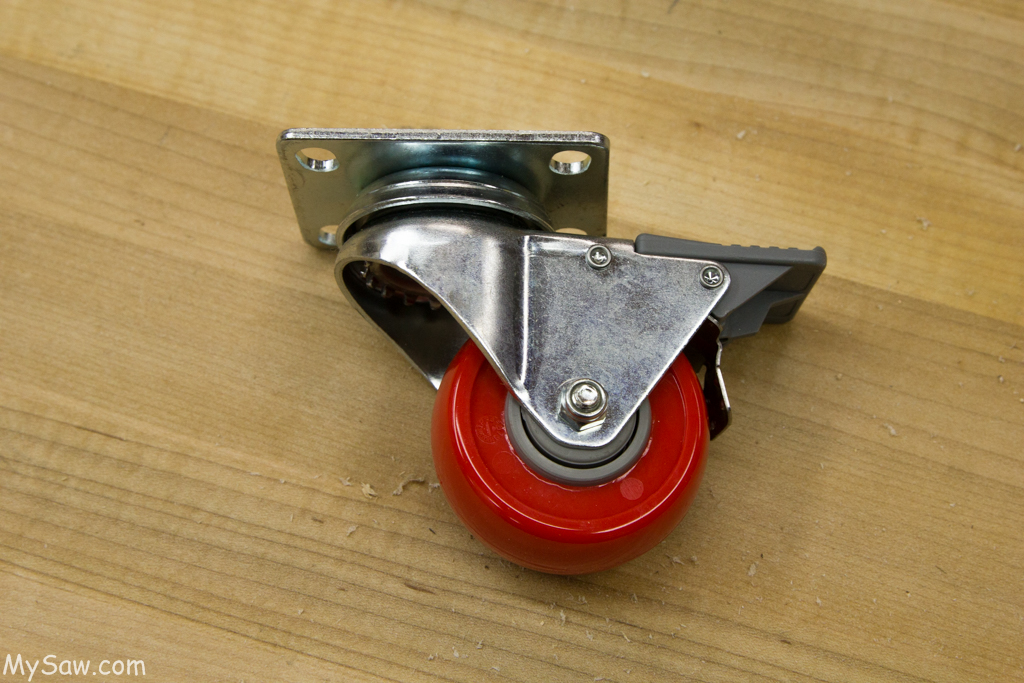
Again, checking with my wife, I proudly showed her the excellent locking casters I had purchased to facilitate moving this around and securely locking when in use. They are ORGANGE !! “Well yes but they are really great casters.” Lots of searching and I found the replacement casters at Rockler. So always check with your customer about details and never assume you understand the requirement.
Cabinet Building
For me, the primary consideration requirement for cabinet building is 90 degree everything and parallel sides. Seems silly to state that but very small variances will multiply. In very large cabinet shops where you have big sliding table saws and people who do this very day, it becomes standard procedure. In a home shop, not so much.
So remember, Patience and Precision !!
I have build several cabinet style pieces over the years for the workshop. The router table, saw stop cabinet, new white shelves, and the chisel chest are great examples.
From these builds I have created my own method for cabinet building in my shop.
- I create a basic plan which will show me the widths of the pieces I need.
- Plywood from Home Depot is cut into less than 36 wide pieces on the panel cutter at the store.
- With plywood in the shop, I use a skill saw to cut the plywood into over sized cabinet parts.
- I run everything thru the saw to create a fresh straight edge with the best blade finish possible.
- Cut the pieces to width using the fresh, best edge on the rip fence.
- Pieces are cut to final length using the Jessum Slider on the Saw Stop
- I create a pocket hole plan for all the pieces.
- I typically use ½” ply for the back. This is not cut to exact size until the carcass sides are fastened with pocket hole screws.
- I have use partial pieces of plywood when the surfaces will not be visible, saving lots of material.
- Drawer boxes are build using ¾” ply with pocket holes and but joints. This is very easy and creates a simple very sturdy drawer box.
- I make drawer boxes ¼” shorter than the intended drawer front width. So a 3″ drawer front in the design will have a drawer box that is 2 ¾”
- I DO NOT final size the drawer boxes until the full length drawer slides are in place. From experience, the hardest part of making cabinets with drawers is getting the drawer width exactly correct. This seems like it should be easy since the drawer boxes are “exactly” 1″ less than the width of the drawers, but I have had trouble.
- Mounting drawer slides for me, is best done with the sides of the cabinet laying flat and marked as a pair.
- Drawers are installed from the bottom up, using 1/8″ and 1/4″ spacers.
- Drawer fronts are milled slightly over sized and and planed to the exact dimension of the opening. I use 3 playing cards on bottom and sides for clearance sizing.
- Dressing on the raw plywood edges is clear pine which is ¼’ thick to a 1 x ¾ facing board.
Video
This was the first time I have used a shelf pin template system. Here is my version of how to use the Woodpecker Template.
Process Pictures
Below are process pictures of this cabinet build with commentary. These show example of the process outlined above.