The objective for today is flattening the bottom and milling the 6 rails. Lot of hand work with my planes. Been out of the shop for a few days. It was good to get back to the workbench build.
The first task was to get the top out of the clamps. I had to lift the top to put support blocks under it to free the clamps. This thing is heavy. I can lift one end at a time. Once the clamps were free I had to turn the top over. I had been working with the top side up. I needed to work on the bottom side. Well, one person !!! I clamped some stop blocks to the side of the workbench so I could lift one side without it sliding off the bench ( Sorry no pictures ). This worked by really showed me how careful I need to be moving this slab of maple. It is now just under 26″ wide, 88″ long and 3 11/16″ thick ( call it 3 3/4″ .)
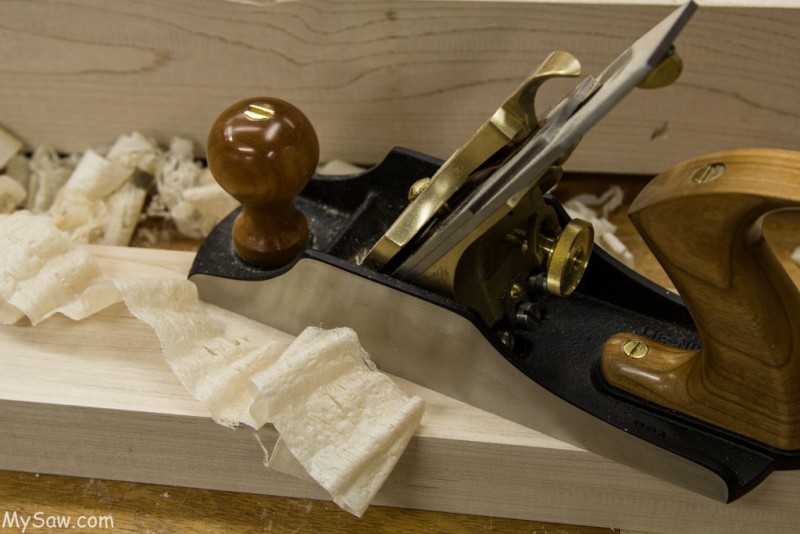
The bottom was planed flat with a LN #8. Diagonal passes several times, using a Veritas Aluminum Straightedge. This took about 1 1/2 hours. Not bad. It is not perfect finish, but is flat. I had purchased the LN #8 two years ago, knowing I would need it for this project and lots of future projects. I was going to purchase a #7, but my friend Steve Quehl ( former Woodcraft Atlanta store owner ) recommended that go to a #8. “Why not ?” he asked. I am very happy with the decision. A little longer and heavier it just works great. It is a pleasure to use and a lot of work !!
Next, I got the plans out to find dimensions for the front, back and end rails. These are all 1 3/4″. Front rails are 4 1/4 and end rails were 3 1/2. This was a process of cutting stock to rough length and doing a four square process on them.
After machine milling, I wanted to plane all the machine surfaces to be ready for the final finish. This was a hand plane adventure. All of this “soft” maple has grain going in both directions on many of the surfaces. So the LN 5 1/2 and 4 were really tearing into some grain. I then remembered by LN # 4 1/2 55 degree frog. WOW, did it work. So using all three planes I was able to get these parts milled and finish planed.
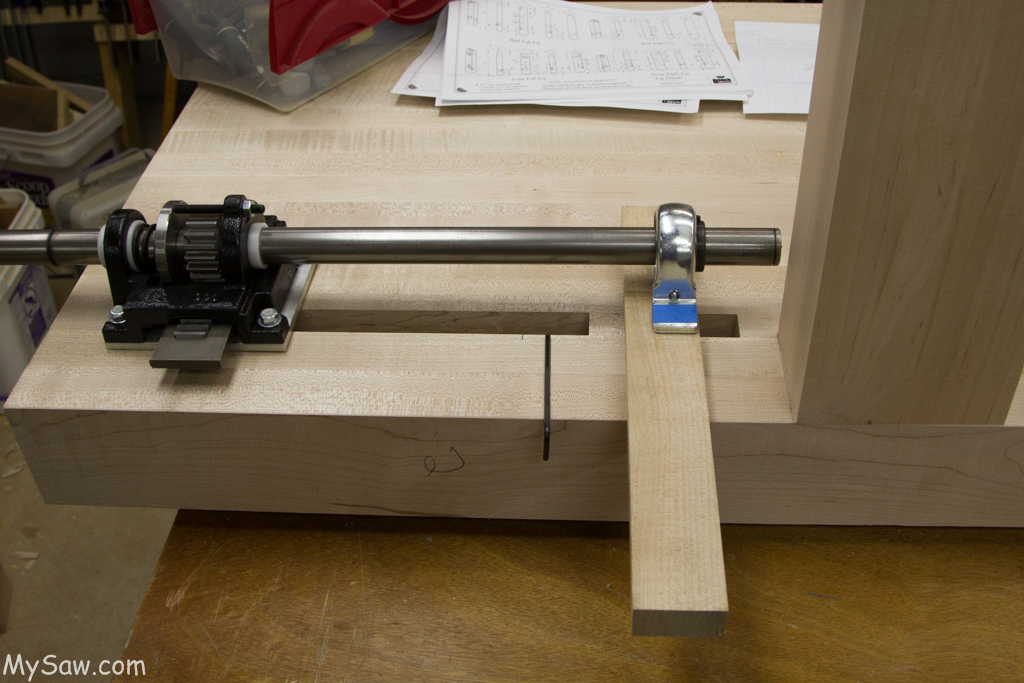
There are a few pictures showing my planer setup routine. I can now set this up in about 2 mins.
I did discover a small problem with the tail vise and a dog hole, but thanks to good engineering my Hovarter, I think I have a solution.
On to day 14.
Bench Build Blog Index
Please enjoy the full set of day 13 pictures with detailed comments: