The objectives today are to finish the twin vise and tail vise installations.
Twin Vise
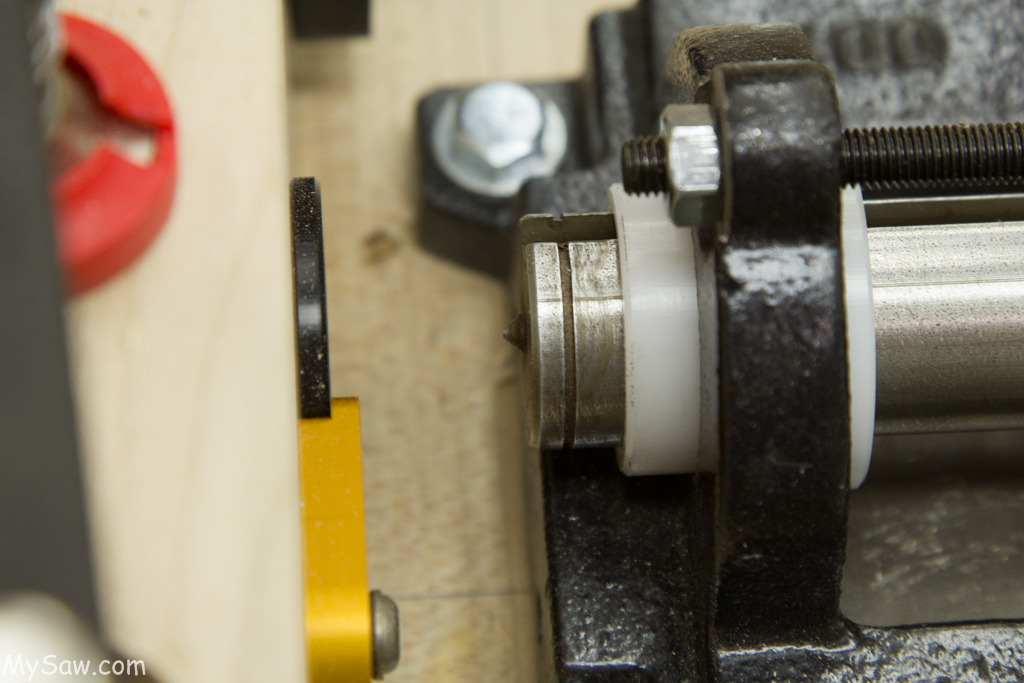
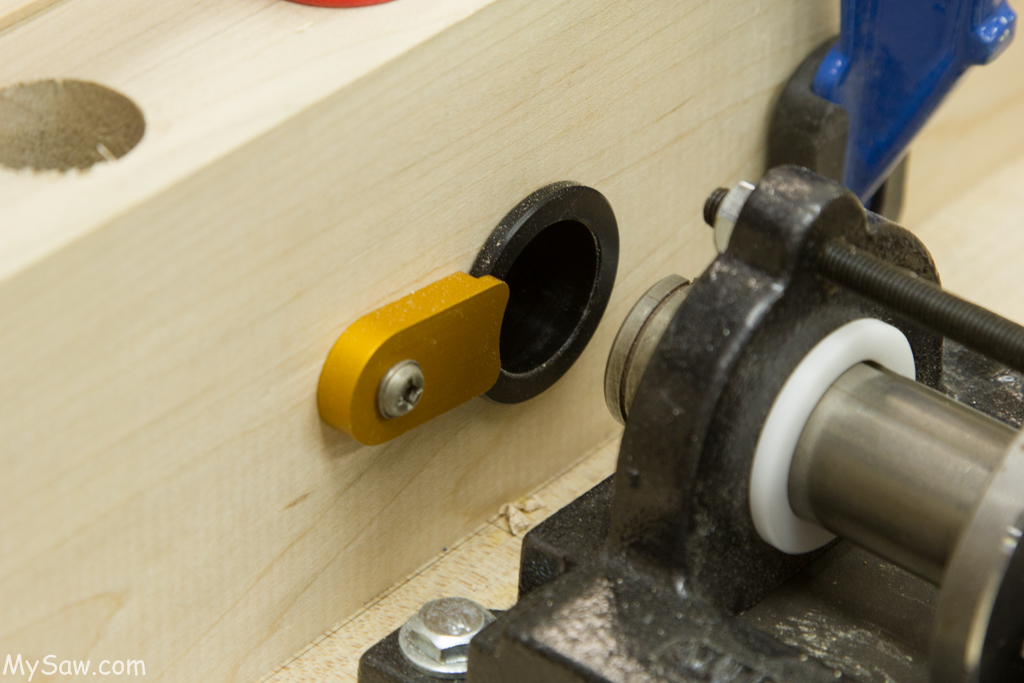
All that remains for the twin vise is to mill a 2″ front vise face. This is required so that I can mark the shaft center holes on the vise front face without have to do very intense measurements and markings. I milled down more of the 12/4 maple stock I purchased a few weeks ago. Clamped the vise in place and used the shaft with a center punch mark to mark the shaft location.
Tail Vise
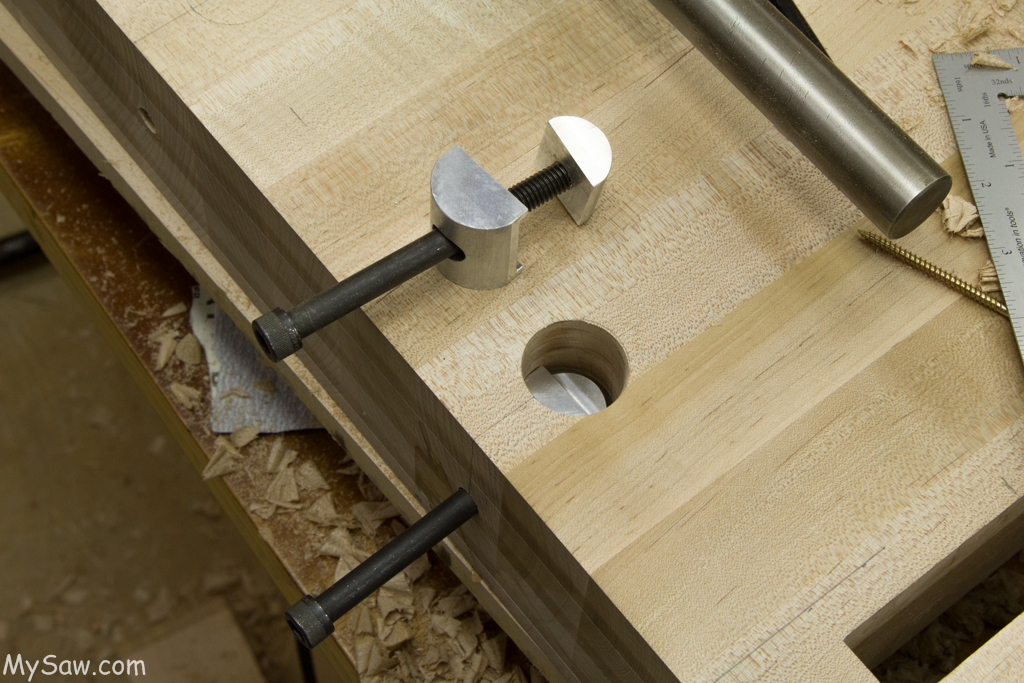
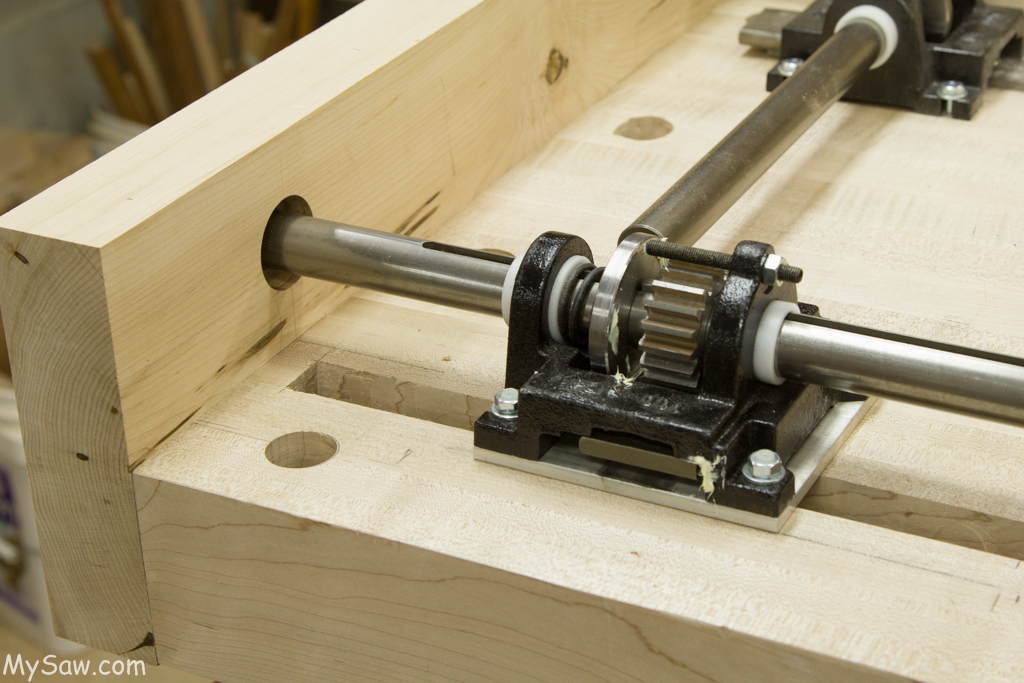
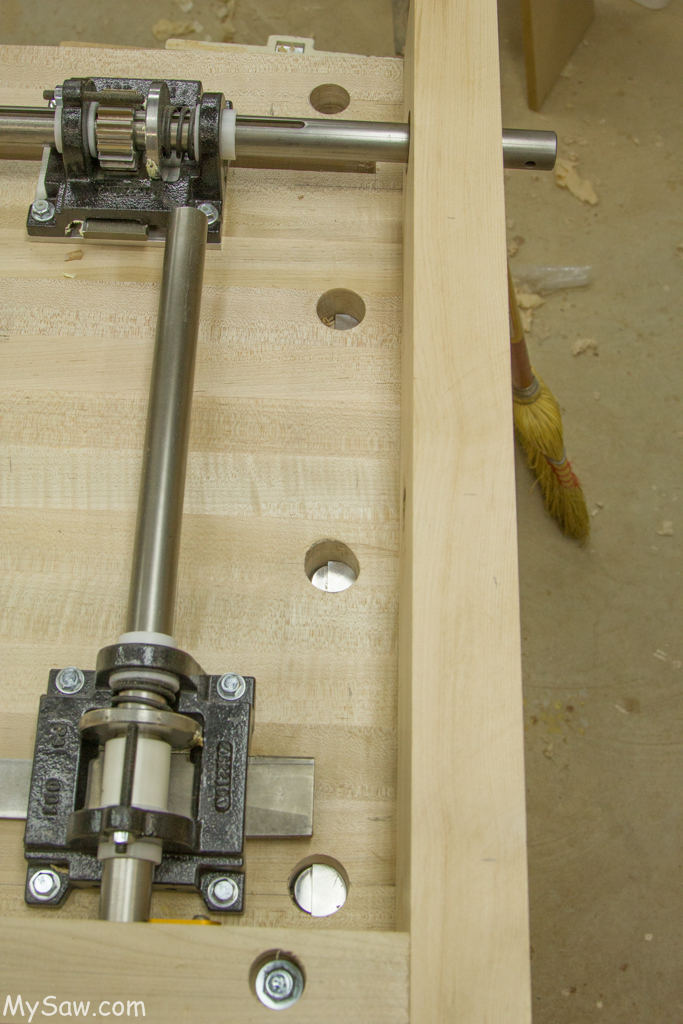
The tail vise required much more work. I had milled the bench end stock that is required form the tail vise install. This piece require 4 bolts into the end of the bench top. One of the bolts is a fixed bolt, the other three are allowed to move with the natural wood expansion and contraction. The location of these was determined and marked on the stock. FAIL NOTE: I did not have instructions with these bolts. ( There might have been, but I did not find them.) Since the purpose of 3 of the bolts is to allow movement, this means the bolts must be able to move in the bench top. I drilled the holes at 3/8 which is the bolt size. So there would be NO way for the expansion system to work. I actually noticed this as I was preparing the pictures with comments. The solution will require me to flip the bench top back over so I can access the nut assemblies. I will then enlarge the holes to 1/2″ to allow movement. Then reassemble the tail vise. This will actually give me a chance to refine the alignment of the tail vise. It is about 1/16″ off. Hard to explain.
A part of the install I needed to lengthen the tail vise slot. I miscalculated the required length of the tail vise slot. The working range was 9 1/2″. The spacing on some of the pop up square dogs is 10″. So I would have a gap in the clamping ability. I was able t add 1″+ to the length. This was drilled out with a 7/8″ bit then hand chiseled the rest.
With all this work, I was ready to flip the top. It was really nice to see the real workbench. I have been looking at the bottom for most of the 9 weeks since I started.
Need Feed Back
I am really thinking about the finish process. I am thinking about the workbench top ( and sides) and the base legs, rails and shelf separately. I definitely DO NOT want a slick finished workbench top. I think I like the raw wood which has not been planed smooth. The last plane pass was 90 degrees across the top.
Work Bench TOP:
- NO finish on the top and sided of the work bench top.
- A BLO + bees was + mineral spirits. This would protect the top somewhat from glue spills and the bees was should provide some “stickiness” to the top. This is from Woodnet.net forum attributed to Howard Acheson from the forum.
Work Bench BASE: Legs, rails and shelf.
- Use a BLO + Varnish + mineral spirits to sorta match the top.
- Use General Finishes Enduro-Var satin. I used this on the plane till and saw till and like the results. It is VERY easy to work with and the wife does not complain about the smell. ( There is no smell !)
- Use one coat of BLO to bring out the grain and figure in the maple, then use Enduro-Var.
In Day 27, I will be fixing the FAIL above and milling and fitting the shelf parts. Getting ready to finishing. Will also test some finishes.
Bench Build Blog IndexPlease enjoy the full set of day 26 pictures with detailed comments: