Objectives for today are trimming the drawbore peg, drilling pre-drill holes for lag screws and sizing, cutting tenons and fitting the long rails.
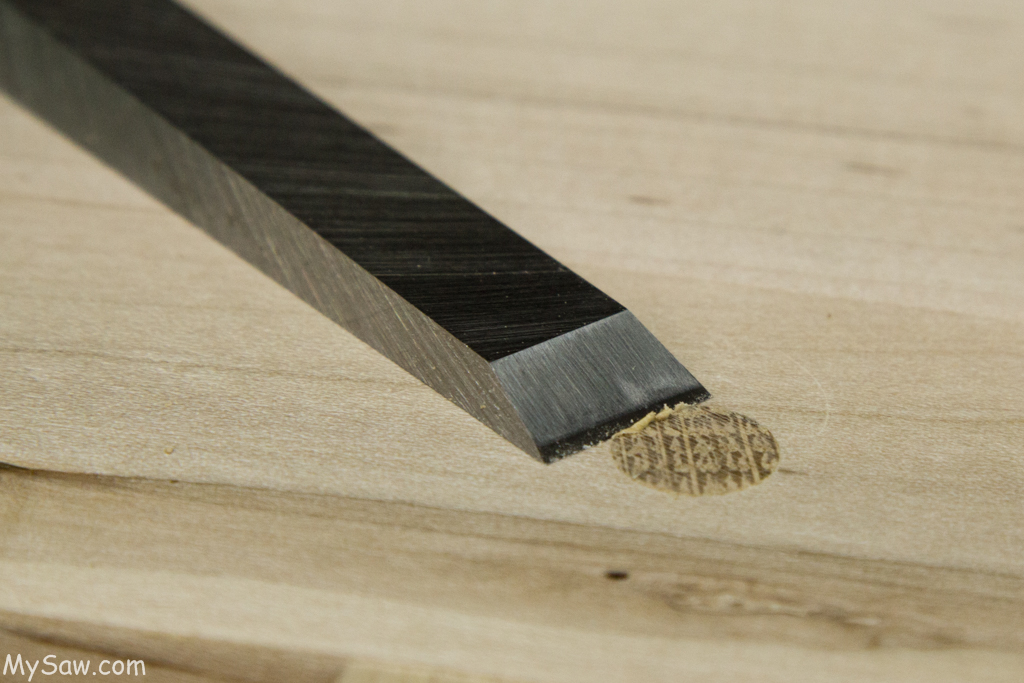 Trimming the drawbore pegs was a first for me. I used the Veritas Flush-Cutting saw. The cut was amazing. A little experimentation to hold the saw very flat and I got almost perfect cuts. Also more experimentation on how to really flush the pegs. I found the best tool was a 1/2″ chisel. Just held it flat to the surface and slowly sliced the excess on the pegs.
 Next up was pre drilling the holes for the 3/8″ x 5 1/2″ lag bolts. I am using Home Depot lag bolts. The pre-drilling took some experimentation. I started with a 7/32″ pre-drill. I tried to run in a lag bolt with a socket and ratchet. This was going to take too much effort and I could see problems after an inch or so. I then tried a 1/4″ drill. Same problem. So I went to a 5/16 inch drill. This felt like I would be able to run in the lag bolts and not have problems after an inch or so. My final solution was to pre-drill with the 7/32″ drill followed by the 5/16″ about 3/4 of the dept. I figured this would give me really tight holding for about 1/2″ at the bottom of the screw depth. ( How confusing can this be…. So just experiment. ) The 7/32″ drill is part of the Snappy Tools 7 Piece Drill Bit Adapter Set.
Finally, I needed to size and put tenons on the long rails. This was straight forward process. I also created the ledger rails that will hold the shelf on the lower rails. This was just a fun milling process with some pre-planning to make the cuts as easy and accurate as possible.
The tenons on the long rails fit on the first try, with just a very little bit of trimming. The fit of these rails just needs to slide in easily. The bolts and barrel nuts are the real strength of this joint. This process is supported using my 7 ft pipe clamps. I knew I would need them someday.
So day 25 will be drilling the holes with at least a 9″ drill. I have done the process on another bench. It seems easy and I have read the Bench Crafted PDF write up, but it can go wrong. First I have to find a very long 1/2″ bit!
Bench Build Blog Index
Please enjoy the full set of day 22 pictures with detailed comments: